
For the next two days Angela Barkhouse is guest blogging and sharing with us this terrific calendar she designed using a variety of JustRite Products.
Here's Angela:
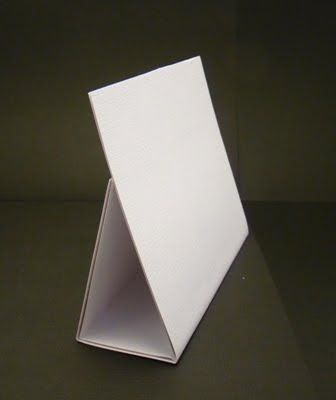
The idea for this project came to me in the middle of the night. I woke up out of a sound sleep, went to my design room and drew it out on a piece of paper so that I wouldn’t forget it by morning. .JPG) To begin my calendar, I needed to create a stand for it. To do this, I took a 10 1/2” x 6” piece of cardstock and scored it at 5” & 7”. For stability I cut pieces of chipboard, adhered it to the cardstock
To begin my calendar, I needed to create a stand for it. To do this, I took a 10 1/2” x 6” piece of cardstock and scored it at 5” & 7”. For stability I cut pieces of chipboard, adhered it to the cardstock
 and then covered it with another piece of cardstock. I applied adhesive to the back to make the stand.
 Now for the fun part of my project – designing the calendar pages. For each month I chose the designer paper first and then chose the ink color to match.

 For the month of February I used a piece of OXOX paper from the DCWV Spring Stack. The month of “February” was stamped onto white cardstock using Brilliance Rocket Red. The hearts were cut using my Cricut Expression and the Doodlecharms cartridge.
 For the month of March I used a piece of St. Patrick’s Day paper from the DCWV Spring Stack. The month of “March” was stamped onto white cardstock using Versamagic Tea Leaves. I used the St. Patrick’s Day center from the Favorite Occasions Borders & Centers set stamped onto white cardstock using Versamagic Tea Leaves, colored the image with my Copics, then mounted onto brown cardstock. The shamrocks were cut using my Cricut Expression and the Doodlecharms cartridge.
 For the month of April I used a piece of Easter paper from the DCWV Spring Stack. The month of “April” was stamped onto white cardstock using Versamagic Pink Grapefruit. The eggs were cut using my Cricut Expression and the Doodlecharms cartridge. Then I applied Stickles to decorate the eggs.
For the month of May I used a piece of “Mother” paper from the DCWV Spring Stack. The month of “May” was stamped onto white cardstock using Versamagic Pink Petunia. . Using the small horizontal wood stamper, I used the Curlz 25 point font and spelled “Moms Are Special” & “I’m Glad You’re Mine” and then diecut them using the Spellbinders Blossom Nestabilities. The flowers are from Creative Impressions with Kaiser rhinestones in the center.
For the month of June I used a piece of BBQ paper by Flair Designs. The month of “June” was stamped onto white cardstock using Versamagic Jumbo Java.The “#1 Dad” ribbon was made using the 50 point Curlz font as well as the Spellbinders Pinking Circle Nestabilities. The “Dad” embellishment is from my stash.
To begin my calendar, I needed to create a stand for it. To do this, I took a 10 1/2” x 6” piece of cardstock and scored it at 5” & 7”. For stability I cut pieces of chipboard, adhered it to the cardstock and then covered it with another piece of cardstock. I applied adhesive to the back to make the stand. Now for the fun part of my project – designing the calendar pages. For each month I chose the designer paper first and then chose the ink color to match. I used the new Calendar Borders & Centers set from JustRite Stampers. This set is perfect for someone like me who is just learning to color – this set needs little to no coloring.
Each month was stamped twice onto white cardstock and then diecut using the Spellbinders Oval Nestabilities, which is a perfect match to this stamp set. I used pop dots between the month & border as well as between the border and my designer paper.
I made the mini calendar on my computer and cut it out –( FYI – the size of the mini calendar is 3 ½” x 1 5/8”) and then I matted the calendar onto matching cardstock.
Each calendar page measures 6” x 4 ¾” – cut from corresponding cardstock. The designer paper is cut 5 3/8” x 4 5/8”.
 For the month of January I used a piece of snowflake paper from the DCWV Christmas Stack. The month “January” was stamped onto white cardstock using Brilliance Sky Blue. The stamped snowflake is from the Merry Little Christmas set by JustRite.The snowflakes were cut using the EK Success Kaleidopunch snowflake. Each snowflake has a Kaiser rhinestone in the center and I placed 3 Kaiser rhinestones below the month.
Each month was stamped twice onto white cardstock and then diecut using the Spellbinders Oval Nestabilities, which is a perfect match to this stamp set. I used pop dots between the month & border as well as between the border and my designer paper.
I made the mini calendar on my computer and cut it out –( FYI – the size of the mini calendar is 3 ½” x 1 5/8”) and then I matted the calendar onto matching cardstock.
Each calendar page measures 6” x 4 ¾” – cut from corresponding cardstock. The designer paper is cut 5 3/8” x 4 5/8”.
For the month of January I used a piece of snowflake paper from the DCWV Christmas Stack. The month “January” was stamped onto white cardstock using Brilliance Sky Blue. The stamped snowflake is from the Merry Little Christmas set by JustRite.The snowflakes were cut using the EK Success Kaleidopunch snowflake. Each snowflake has a Kaiser rhinestone in the center and I placed 3 Kaiser rhinestones below the month. For the month of February I used a piece of OXOX paper from the DCWV Spring Stack. The month of “February” was stamped onto white cardstock using Brilliance Rocket Red. The hearts were cut using my Cricut Expression and the Doodlecharms cartridge. For the month of March I used a piece of St. Patrick’s Day paper from the DCWV Spring Stack. The month of “March” was stamped onto white cardstock using Versamagic Tea Leaves. I used the St. Patrick’s Day center from the Favorite Occasions Borders & Centers set stamped onto white cardstock using Versamagic Tea Leaves, colored the image with my Copics, then mounted onto brown cardstock. The shamrocks were cut using my Cricut Expression and the Doodlecharms cartridge. For the month of April I used a piece of Easter paper from the DCWV Spring Stack. The month of “April” was stamped onto white cardstock using Versamagic Pink Grapefruit. The eggs were cut using my Cricut Expression and the Doodlecharms cartridge. Then I applied Stickles to decorate the eggs.For the month of May I used a piece of “Mother” paper from the DCWV Spring Stack. The month of “May” was stamped onto white cardstock using Versamagic Pink Petunia. . Using the small horizontal wood stamper, I used the Curlz 25 point font and spelled “Moms Are Special” & “I’m Glad You’re Mine” and then diecut them using the Spellbinders Blossom Nestabilities. The flowers are from Creative Impressions with Kaiser rhinestones in the center.
For the month of June I used a piece of BBQ paper by Flair Designs. The month of “June” was stamped onto white cardstock using Versamagic Jumbo Java.The “#1 Dad” ribbon was made using the 50 point Curlz font as well as the Spellbinders Pinking Circle Nestabilities. The “Dad” embellishment is from my stash.
Stop back in tomorrow to see the second half of Angela's calendar.
Keep us in mind....."When it needs to be JustRite".


12 comments:
What a super cool calendar, Angela, LOVE all your special details!
I love this calendar idea! It will be a great project for upcoming holiday gifts! TFS!
Great idea- thanks for the measurements too- I just treated myself to new fonts (yea sale) and a bind it all- can't wait to make this project for my sisters for Christmas!!
This is such a great idea! It would make a wonderful Christmas present.
WOW! What a great Idea. I so need to make these for Christmas gifts.
I'm the say way, I do my best craft thinking while I'm sleeping, and have to get up and draw a sketch and put ideas down on paper. Funny how that works. lol!
Thanks for sharing
Sharon
Love it, Angela--great job!
Totally adorable Angela, a wonderful calendar to ring in the New Year with!
oh I love it
Great calendar, Angela!
Angela - This is a wonderful project. Thanks for sharing.
Linda D.
Gorgeous calendar!!! What a great gift idea for the upcoming holiday! :) TFS
Awesome calendar. Definitely a great gift idea.
Post a Comment