
Today Angela is sharing the second half of her calendar project- you will love how she incorporated lots of JustRite Stamp sets into her project. If you would like the printable calendar template email Angela - agbark@roadrunner.com and she will email it to you directly.

For the month of July I used a piece of fireworks paper from Stemma. The month of “July” was stamped onto white cardstock using Versamagic Night Sky. For “God Bless America” I used the 25 point Curlz Font and my small horizontal wood stamper to spell this out and die cut it using the Spellbinders Pinking Circle Nestabilities. The stars were cut using my Cricut Expression and the Accent Essentials cartridge. I applied silver glitter to each star for extra “bling”
 For the month of August I used a piece of floral paper from DCWV. The month of “August” was stamped onto white cardstock using Versamagic Aegean Blue. The flowers are from Prima with Kaiser rhinestones added to the centers.
 For the month of September I used a piece of paper from the DCWV Grade School Stack. The month of “September” was stamped onto white cardstock using Versamagic Hint of Pesto. The school bus was cut using my Cricut Expression and the Doodlecharms cartridge. I stamped the “S.A.D. #21” using the Times Roman 15pt font from JustRite Stampers. 15 point Times Roman Font is only available for purchase with the 2" stamper.
 For the month of October I used Halloween paper from DCWV. The month of “October” was stamped onto white cardstock using Versamagic Pumpkin Spice. I stamped the “BOO” center from the Witch Way To The Treats set (now sold out) onto white cardstock using Brilliance Jet Black and then clear embossed it to give it a shine. I cut the spider web from Making Memories Spellbound paper and pop dotted the stamped image to it. The spider was cut using my Cricut Expression and the Doodlecharms cartridge.
For the month of November I used a piece of leaf paper from Provocraft. The month of “November” was stamped onto white cardstock using Versamagic Gingerbread. The Cornucopia image is from the Favorite Occasions Borders & Centers set, stamped onto white cardstock using Memento Black and colored with Copics.

For the month of December I used a piece of paper from the DCWV Christmas Stack. The month of “December” was stamped onto white cardstock using Brilliance Rocket Red. I used the “Don’t Peek” center from the Tiny Words Borders & Centers set, stamped onto white cardstock using Brilliance Rocket Red and mounted onto green cardstock. The Sleigh was cut using my Cricut Expression and the Christmas Cheer cartridge. The Santa sticker is from my stash.
Once all of the months are done bind them all together using the Bind-it-all and ¾” white wire.
This calendar was a lot of fun to make and would make a great gift for anyone who is hard to buy for.
Once all of the months are done bind them all together using the Bind-it-all and ¾” white wire.
This calendar was a lot of fun to make and would make a great gift for anyone who is hard to buy for.
Keep us in mind....."When it needs to be JustRite".


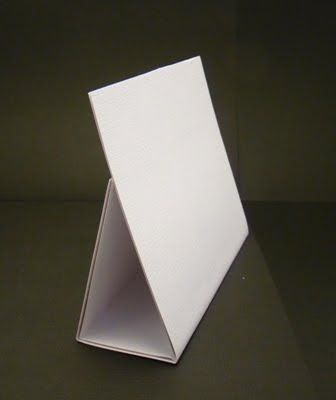
.JPG) To begin my calendar, I needed to create a stand for it. To do this, I took a 10 1/2” x 6” piece of cardstock and scored it at 5” & 7”. For stability I cut pieces of chipboard, adhered it to the cardstock
To begin my calendar, I needed to create a stand for it. To do this, I took a 10 1/2” x 6” piece of cardstock and scored it at 5” & 7”. For stability I cut pieces of chipboard, adhered it to the cardstock and then covered it with another piece of cardstock. I applied adhesive to the back to make the stand.
 Now for the fun part of my project – designing the calendar pages. For each month I chose the designer paper first and then chose the ink color to match.
  For the month of January I used a piece of snowflake paper from the DCWV Christmas Stack. The month “
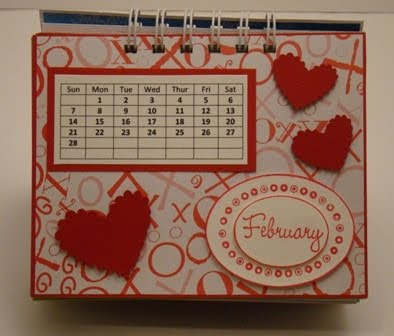 For the month of February I used a piece of OXOX paper from the DCWV Spring Stack. The month of “
 For the month of March I used a piece of St. Patrick’s Day paper from the DCWV Spring Stack. The month of “
 For the month of April I used a piece of Easter paper from the DCWV Spring Stack. The month of “

 The Blog Hop is so large that it will be a two day event!! We have 50 designers lined up to inspire you to pick up your JustRite Font and get busy customizing everything you make!! Or if you have taken the font plunge yet....you are going to want too!!
 The trees on either side of my page were cut using my Cricut Expression and the "Stretch Your Imagination" cartridge. I really like the new options on the Cricut Expression whihch allowed me to choose the option "Fit To Page" which cuts the tree large enough for a scrapbook page without having to guess and cut multiples while trying to find the right size. In this case, the tree is cut at 11 1/2". For this page I decided to cut the tree in half so that I could frame each side of the page with a tree branches. This requires for one side of the tree to be flipped over before I embossed the tree trunks using the Cuttlebug Forest Branches embossing folder.
 My colorful leaves are also cut using my Cricut Expression and the Doodlecharms cartridge. For my pile of leaves I cut several different sizes of leaves adjusting them as I filled my page with leaves. Next I decided to add extra journaling to my page by picking words tha remind me of Fall.

 Be sure to stop into tomorrow to see Angela's next project for Back to School! You are going to love it!!