Good Morning Everyone,I can't even tell you how thrilled I am to be a Guest Designer for Just Rite! And for Day 2's projects, I am so excited to share with you some fun
Just Rite yumminess using the gorgeous oval stamps in this beautiful stamp set:
Christmas Joy Borders & Centers Oval (1 3/4" x 2 5/15" . I don't "go oval" as much as I would like to and had a lot of fun with all of these yummy oval stamps! For today's project, I altered some oval boxes and went somewhat vintage with decorating them. I altered three oval boxes with three different sentiments with alternating borders from this awesome stamp set to go with it - and also a card to go along with this set.

Each the bottom of the box is covered with a strip of the DP and then the sides of the top of the box were colored with copics. I stamped the sentiment twice onto the yellow cardstock and then stamped the border and then cut it out and popped it up on dimensionals over the sentiment so that it created a little frame over the sentiment. Here is a picture of the oval boxes together:

and this is a side view of the oval boxes:
+by+Sankari+Wegman.JPG)
This oval box features the sentiment:
Joy - I love the holly that surrounds this word "Joy" - I colored the holly blue with some Sakura gelly roll pens and then added some Adirondack pearls onto the berries. I added some liquid pearls around the edges and sides and a line of pearls on the box and then ribbon from stash.
+by+Sankari+Wegman+(2).JPG)
This oval box features the sentiment:
Wishing You the Blessings of the Season which is stamped in Adirondack Expresso Ink and then decorated with some pearl accents, liquid pearls and ribbon from stash:
.JPG)
This oval box features the sentiment:
A little wish for a Magical Christmas which is stamped in Stazon Olive and then colored in with Copics. The frame is colored in with Copics.

I created a card with the sentiment:
Wishing You the Blessings of the Season. I love layering it up, but at the same time, I tried to keep the card simple so that the sentiment could shine through.

I completely enjoyed making these projects and hope you enjoyed them too! It was so much fun to "oval it up!" and create some oval present boxes to put little holiday gifts in!
Please stop by tomorrow for projects that involve socks, snow and butterflies!!!
Hope you are intrigued :))) See you tomorrow!!!!
Big sunny hugs!!!
Sankari :)
---------------------------
Card Ingredients:
Paper: Nutcracker paper from Graphic 45, cardstock from Bazzil
Stamps:
Christmas Joy Borders & Centers Oval (1 3/4" x 2 5/15")
Inks: Color Box Chalk, Stazon Olive, Memento Lady Bug Red, Memento Rich Cocoa
Accessories: Spellbinders, Cuttlebug Swiss Dots folder, corner chomper, Copics, sponge, buttons from stash, ribbon from stash, dimensionals, oval boxes, Zip Dry adhesive, liquid pearls, pearl accents from kaiser, oval cutters from Creative Memories.
Keep us in mind....."When it needs to be JustRite".



 Tosha Lendekker rocked her project with you will just love all the intricate details
 Next stop by and check out Denise Marzec's Christmas Cards using the new JustRite 2" Square Decorative Borders.

 You can start your November Release Inspiration at
  Then you will want to stop by Denise Marzec's blog
  Next stop for today's sneak peeks is Laurie Schmidlin's blog -
 The little metal container has some pink and white socks for the little wee baby and a 12x12 strip of Basic Grey Sultry is wrapped around it. I thought the bootie image was perfect for this cute little container of socks (and yes - I LOVE socks as you probably noticed from day 3's project :)
 I LOVE that I could personalize this gift with my cousin's name and his wife's name - it says: Congratulations: with the names of my cousins' written with Just Rite fonts (Times Roman 15pc). The fun thing is that even thought this bootie stamp is an oval one, after stamping it, I cut it out with some circle spellbinders and then created some layers :)
  Its always so nice to get a card/present in the mail and even nicer I think when it is personalized with your name on it :) Today Just Rite is having an amazing Sale and I can't wait to shop (in my PJ's sipping on some hot cocoa :) A huge thank you to Kellie for everything that she does and for all of you for visiting! I hope you enjoyed the projects this week as much as I enjoyed making them!!
.JPG)
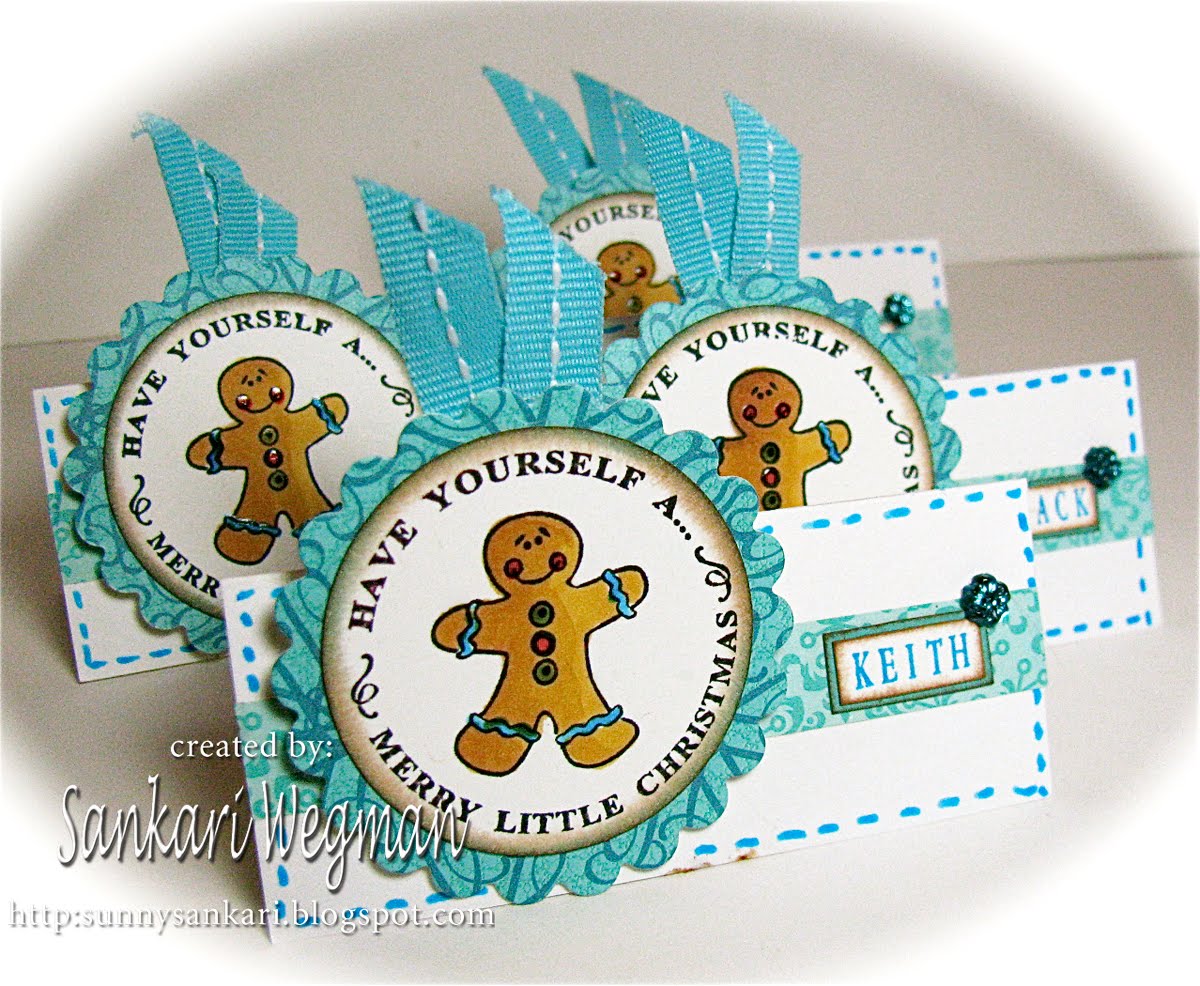
.JPG) Here is view of the place cards with the stamped sentiment: Have Yourself a Merry Little Christmas: I colored in the cute gingerbread men with copics and then went over it with some glaze pens:
Here is view of the place cards with the stamped sentiment: Have Yourself a Merry Little Christmas: I colored in the cute gingerbread men with copics and then went over it with some glaze pens:.JPG) Wishing you a Merry Christmas: The images are colored with copics and then covered with a glaze pen.
Wishing you a Merry Christmas: The images are colored with copics and then covered with a glaze pen. .JPG)


 For the card, I cut out a cared stock and then punched with the lattice edge punch the inside of the card and then cut it a little shorter in the front of the card. So when the card is lying down it looks like this:
 I arranged all the elements on the card and then punched out a circle with my nesties and then on the inside of the card I added the snowflakes are winter's butterflies sentiment which is covered with chunky glitter and then I layered with nesties and decorated with liquid pearls and sponging :)
  It's so nice to have such variety of choices of borders and images to mix and match and there is something about circle stamps where the sentiment is also circular that is just so fun to stamp with! I hope you enjoyed this project and gift idea :) and I hope you come back tomorrow for a little project to make your holiday dinner very special!!!